[ORDER] VEIL - Priority Layering Compositor

safe_image

Description:
VEIL is a three layer subtractive compositor allowing users to stack luma signals and create the effect of perceived depth. The opacity of top layers may be adjusted to obstruct or reveal lower layers. Each knob at the CW position will result in its respective layer appearing to sit on top of the lower layers without “white-blowout” while CCW will approach the function of a typical additive mixer.

VEIL is best used with gradients and can be used in series or parallel with other VEIL modules for a multitude of expandable capabilities. Using two or more VEIL modules in series increases the number of stackable layers and using three VEIL modules in parallel allows users to stack and control the opacity of multiple full-color RGB video sources.

  • ?? mA +12V (TBD)
  • ?? mA -12V (TBD)
  • 0 mA 5V
  • 4HP wide
  • 48.26 mm deep
  • ModularGrid

Prices:
DIY PCB Set: 28 USD + 4 USD shipping
Built Module: 157 USD w/free domestic shipping

  • Please respond or PM me to place an order.
  • BOM and Build Guide are located below in the second reply.

PCB/Panel set Orders:
Names listed below are being contacted shortly…

Qty Name Status
1 MidCitySteve Shipped
2 ReverseLandfill Shipped
1 JamesWashington Shipped
2 IoDionysus Shipped
2 Marizu Shipped
2 allthesiexes666 Shipped
- Second Batch -
+++ Saitron Shipped
1 Lettuce Shipped
2 jnoble Shipped
1 vhsdestroyer Shipped
1 Joem Shipped
2 everyoneismyfriend Shipped
2 vdot Messaged
3 Mattzog Shipped
2 dubpixel Shipped
4 ebbflo Shipped
2 sigdigits Shipped
1+ Iscariot Messaged
3 synlog Shipped
1++ tamas(MG) Shipped
3 Jesse Messaging…
3 Vanta Messaging…
3 motejo Messaging…
3 jreinke Messaging…

Complete Pre-Built Modules:

Qty Name Status
2 Jwsmithwick Shipped
1 DaydreamDevices Shipped
1 blindProphet Shipped
2 wednesdayayay Shipped
1 heythony Shipped
1 maytoast Shipped
1 RoseColouredGlasses Shipped
1 anaogbrainsurgeon Shipped
1 brendanleespengler Messaged
1 TrashTeam Shipped
2nd Batch Building in progress
1 crixmadine Shipped
1 driftwood Shipped
1 hulbs Shipped
1 dora Shipped
2 Jsmithwick1 Shipped
2 analogbrainsurgeon Shipped
1+ FallingGirl Building…
11 Likes

Until I get my Memory Palace, all video credits go to @rempesm who put together some incredible example patches (below):

3 Oscillators:

A couple initial patches. These are all just Prismatic Rays cross patched together (maybe one Navigator and Diver in there) into one RGB path. This is then multed through a YRGB distro into 3 rotated versions (RGB, GBR, BRG) that are patched into the 3 VEIL(s). VEIL is patched into RGB Ch. B of MI for fade to/from black and then into Cadet Encoder.

Here’s using basically one of the last patches, just layered across L2 and then an eyeball on top for L1:

And here’s a simple one with just a FM’d triangle multed across L2 and eyeball on top for L1:

Here’s one using 3 RGB stills across 3x Veils.

Portrait on layer 3, flower on layer 2, fire on layer 1.

This one relies pretty heavily on vertex displacement (one Prismatic Ray with pedestal and frequency inputs modulated by a quadrature LFO) for its overall effect. Maybe not the most immediately obvious demo of the effect but I’m sure you can pick out what’s going on here.

7 inputs across 3 VEIL modules in series:

Same patch but I’m putting the final output of Veil #3 into the R Matrix input of DAISY and then multing the outputs of VEIL #1 and #2 into G and B Matrix inputs of Daisy. I actually don’t mess with any of VEIL’s knobs in this one–they’re all CW. It’s just Daisy’s knobs I’m adjusting.

Three VEIL in parallel to create full-color stacked images. In this patch, three layers are used, but in different combinations of R&G, R&B and B&G to produce only CYM & White colors.
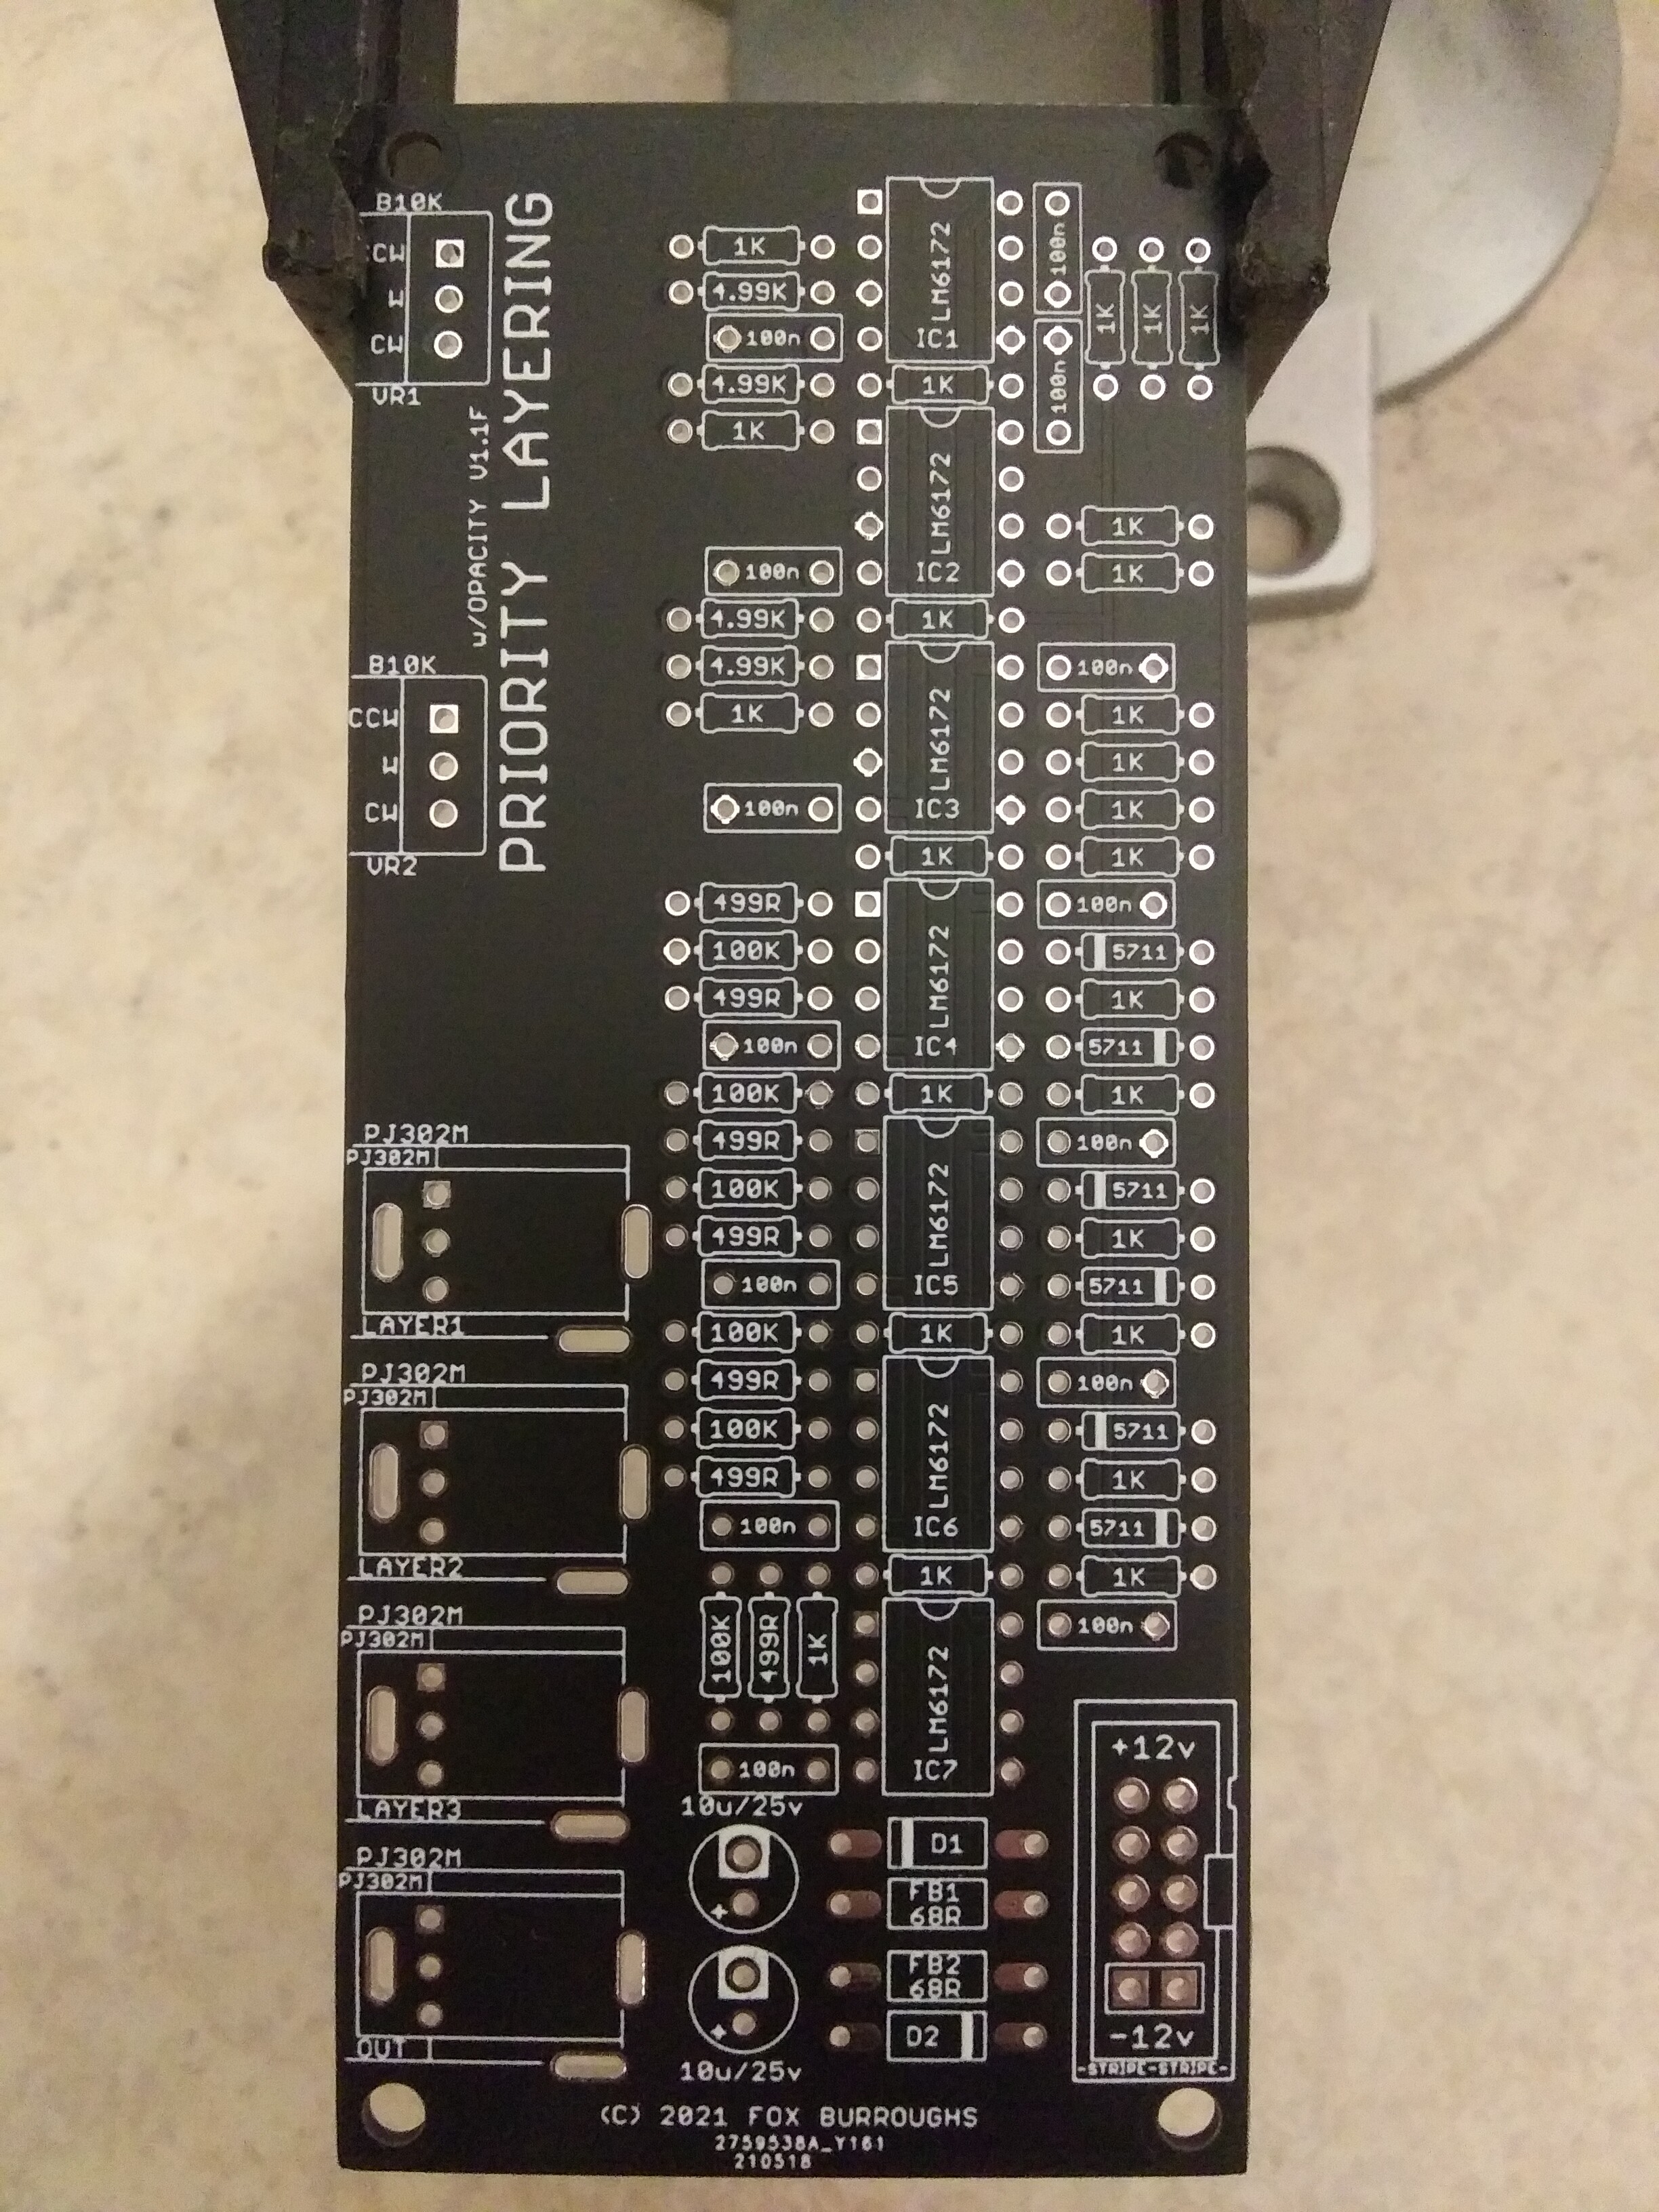
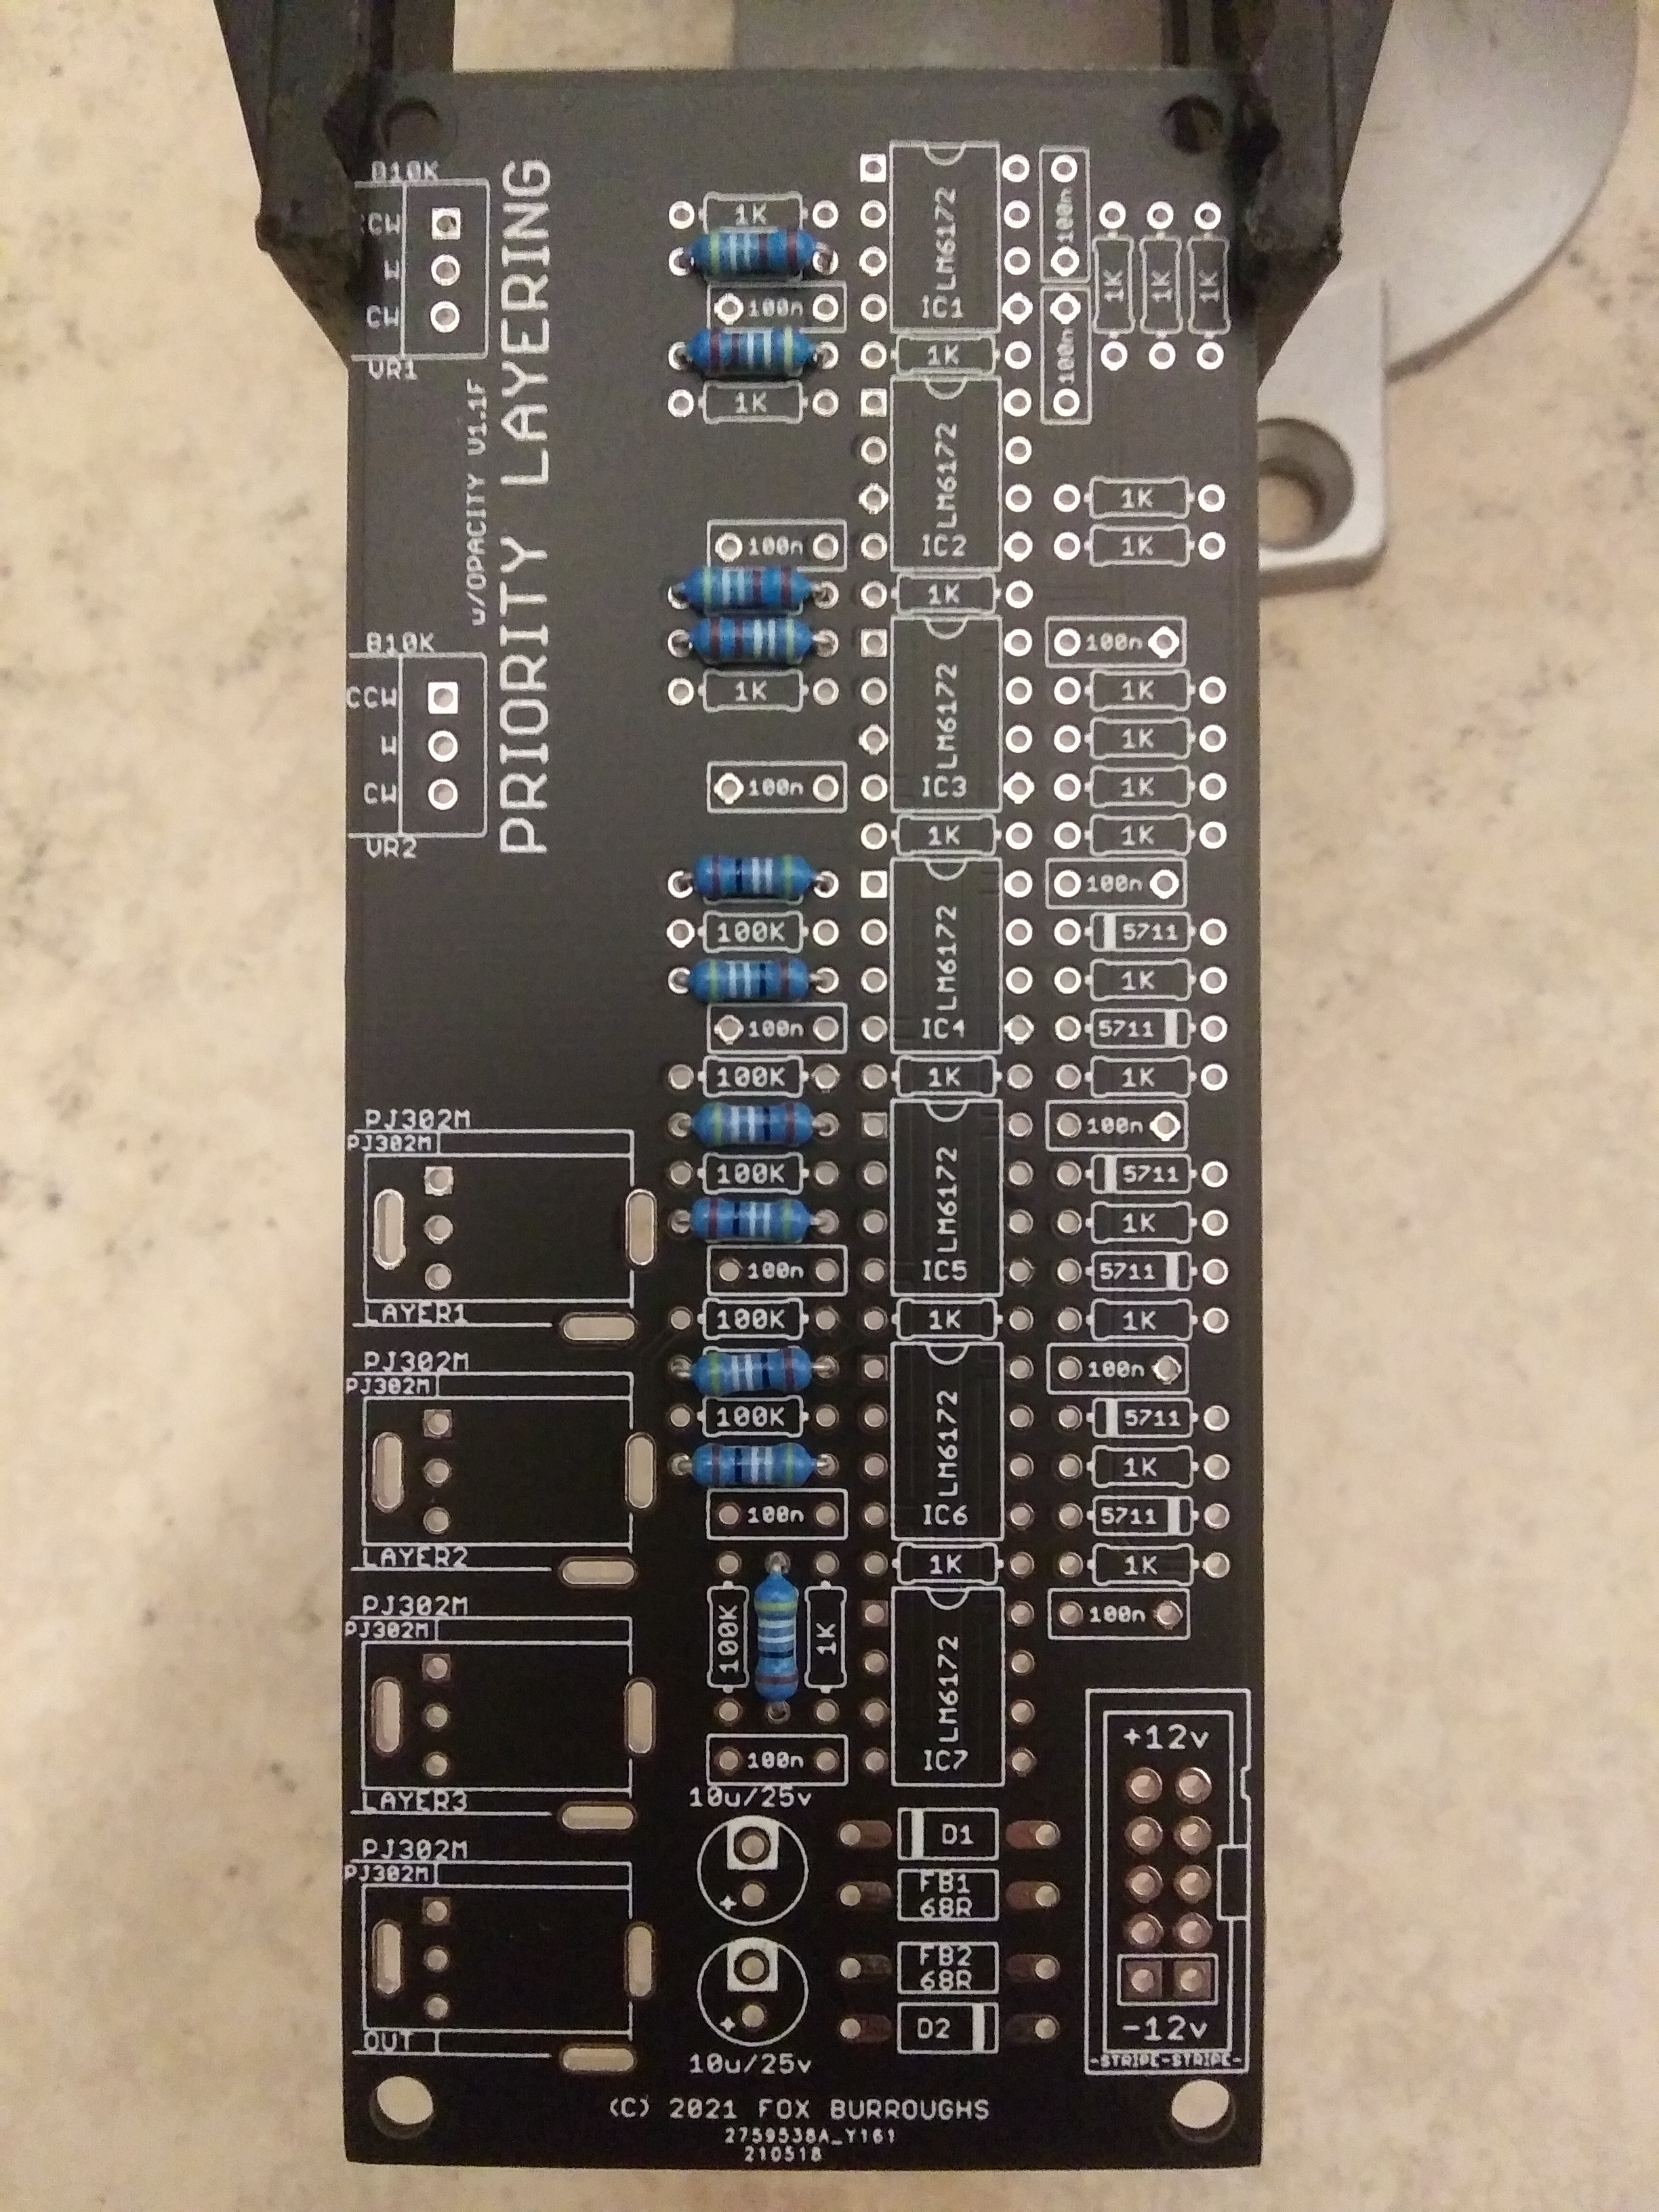
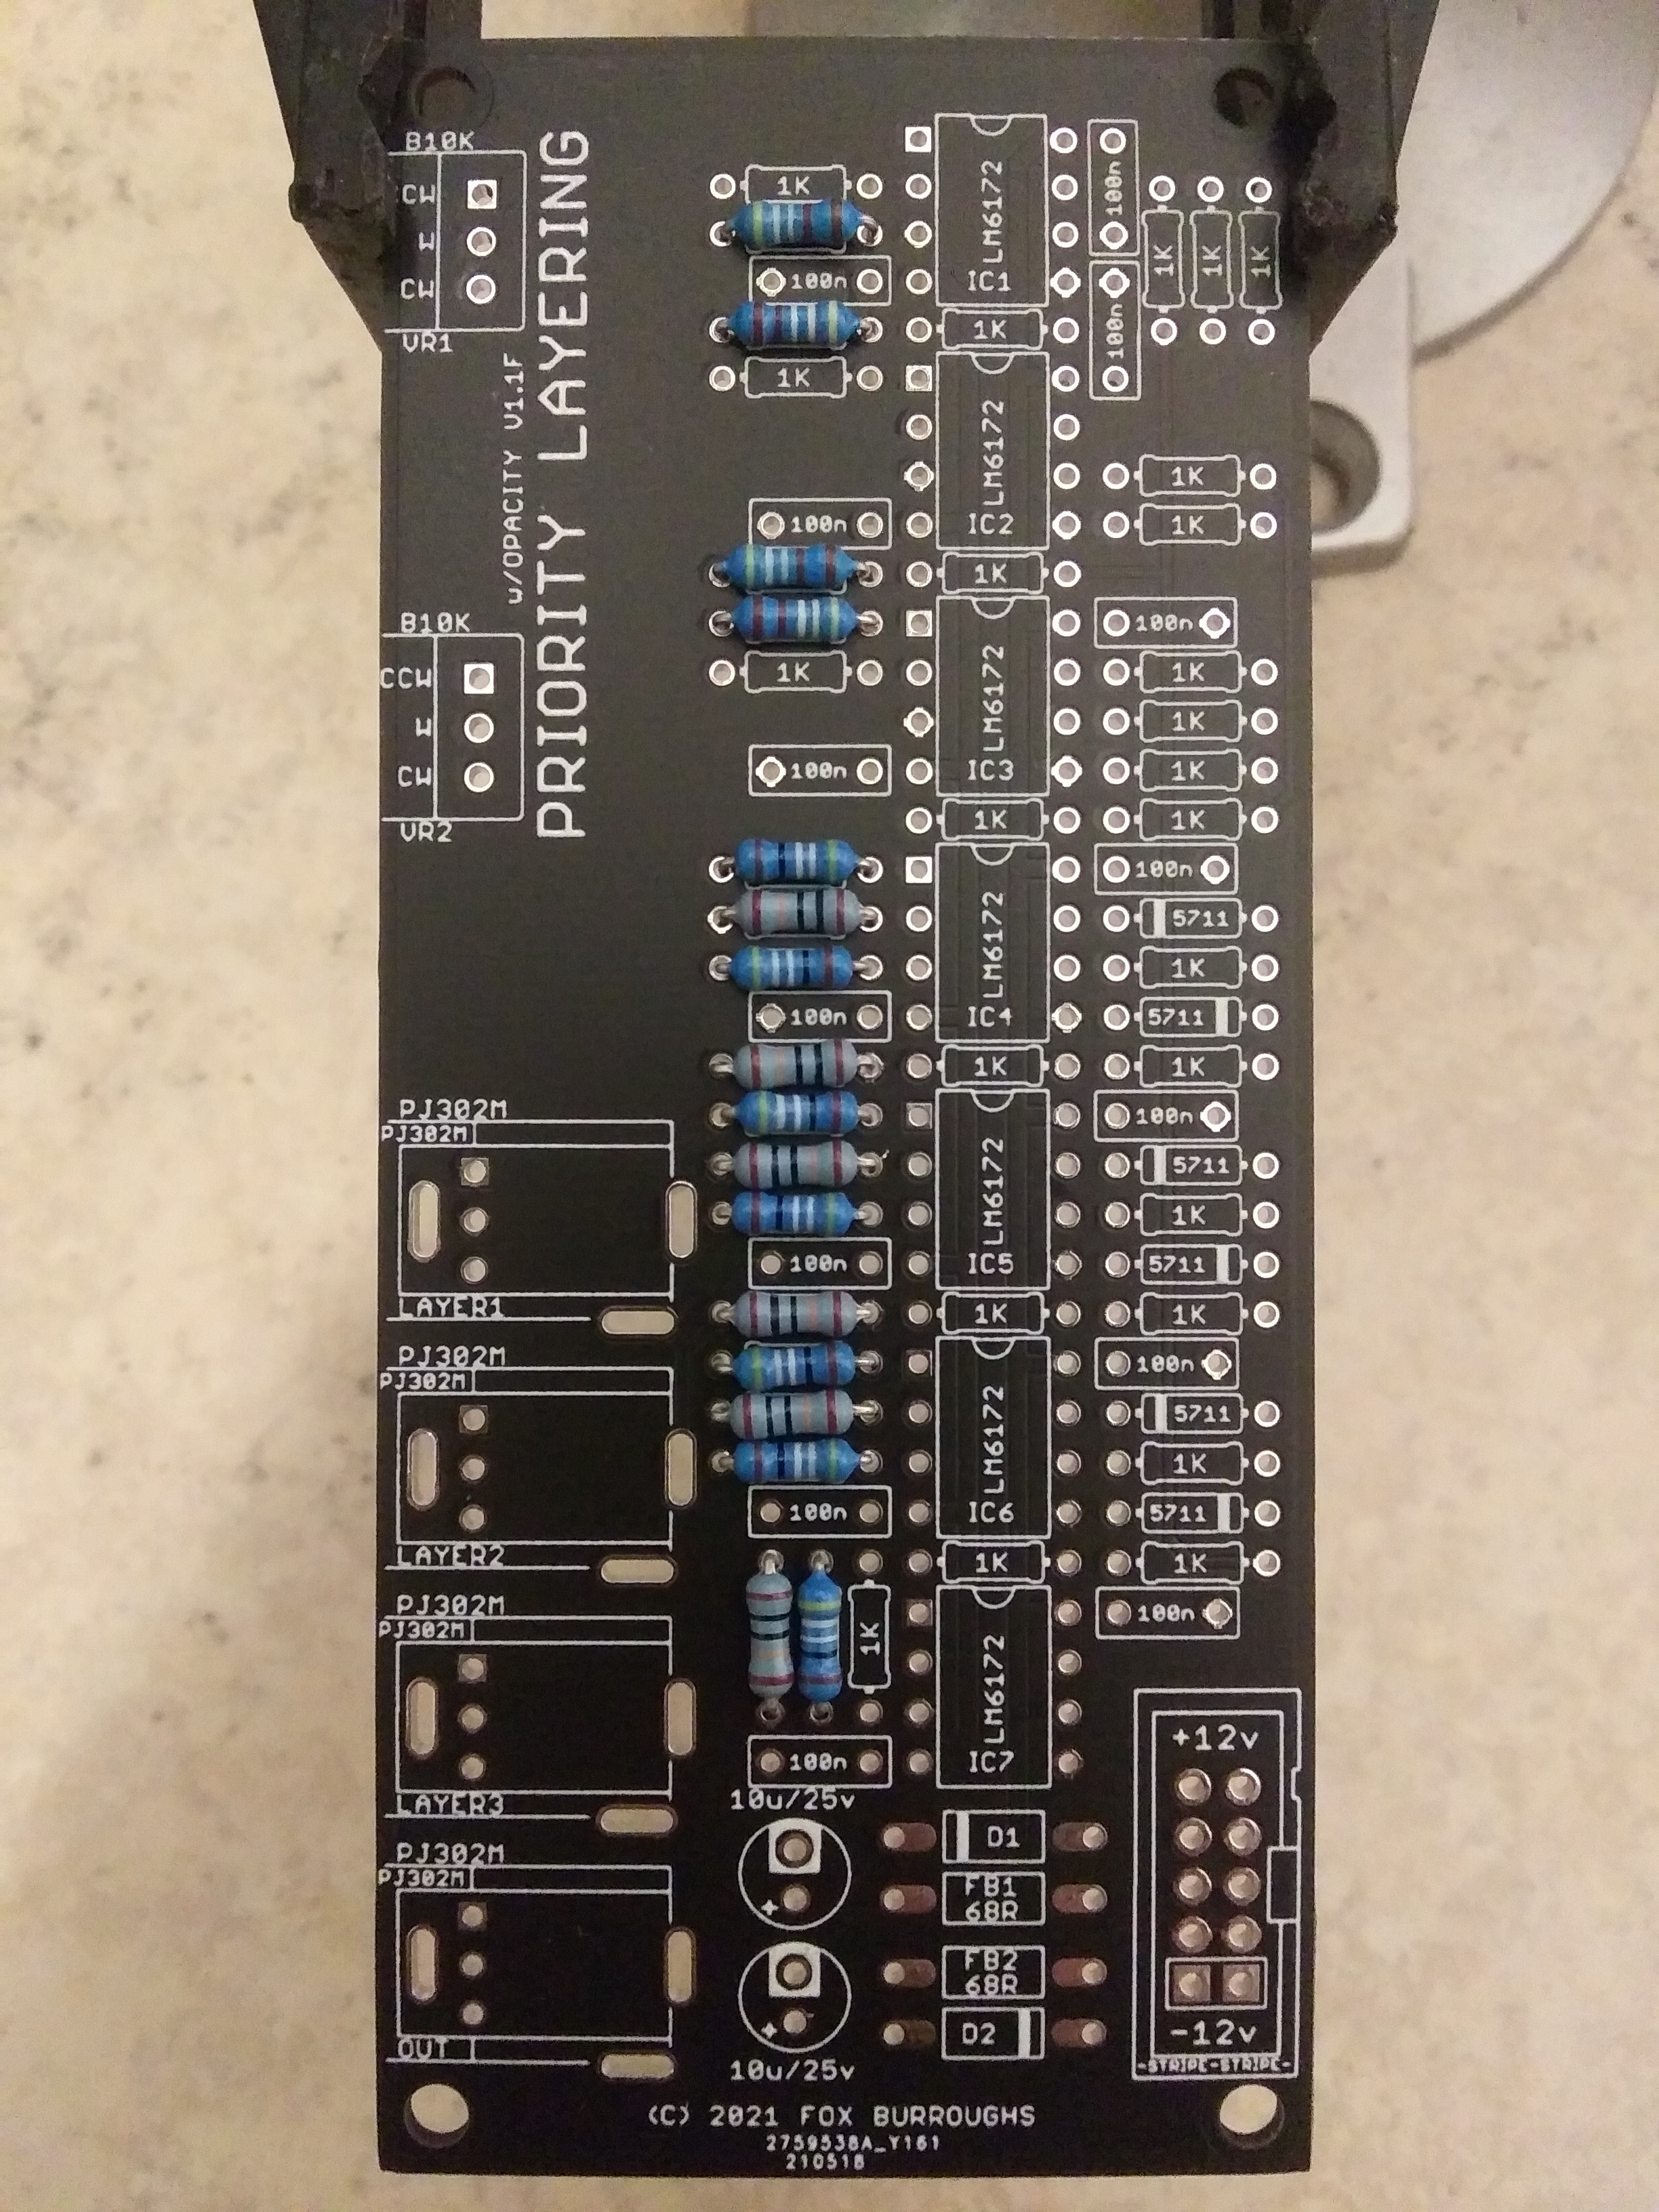
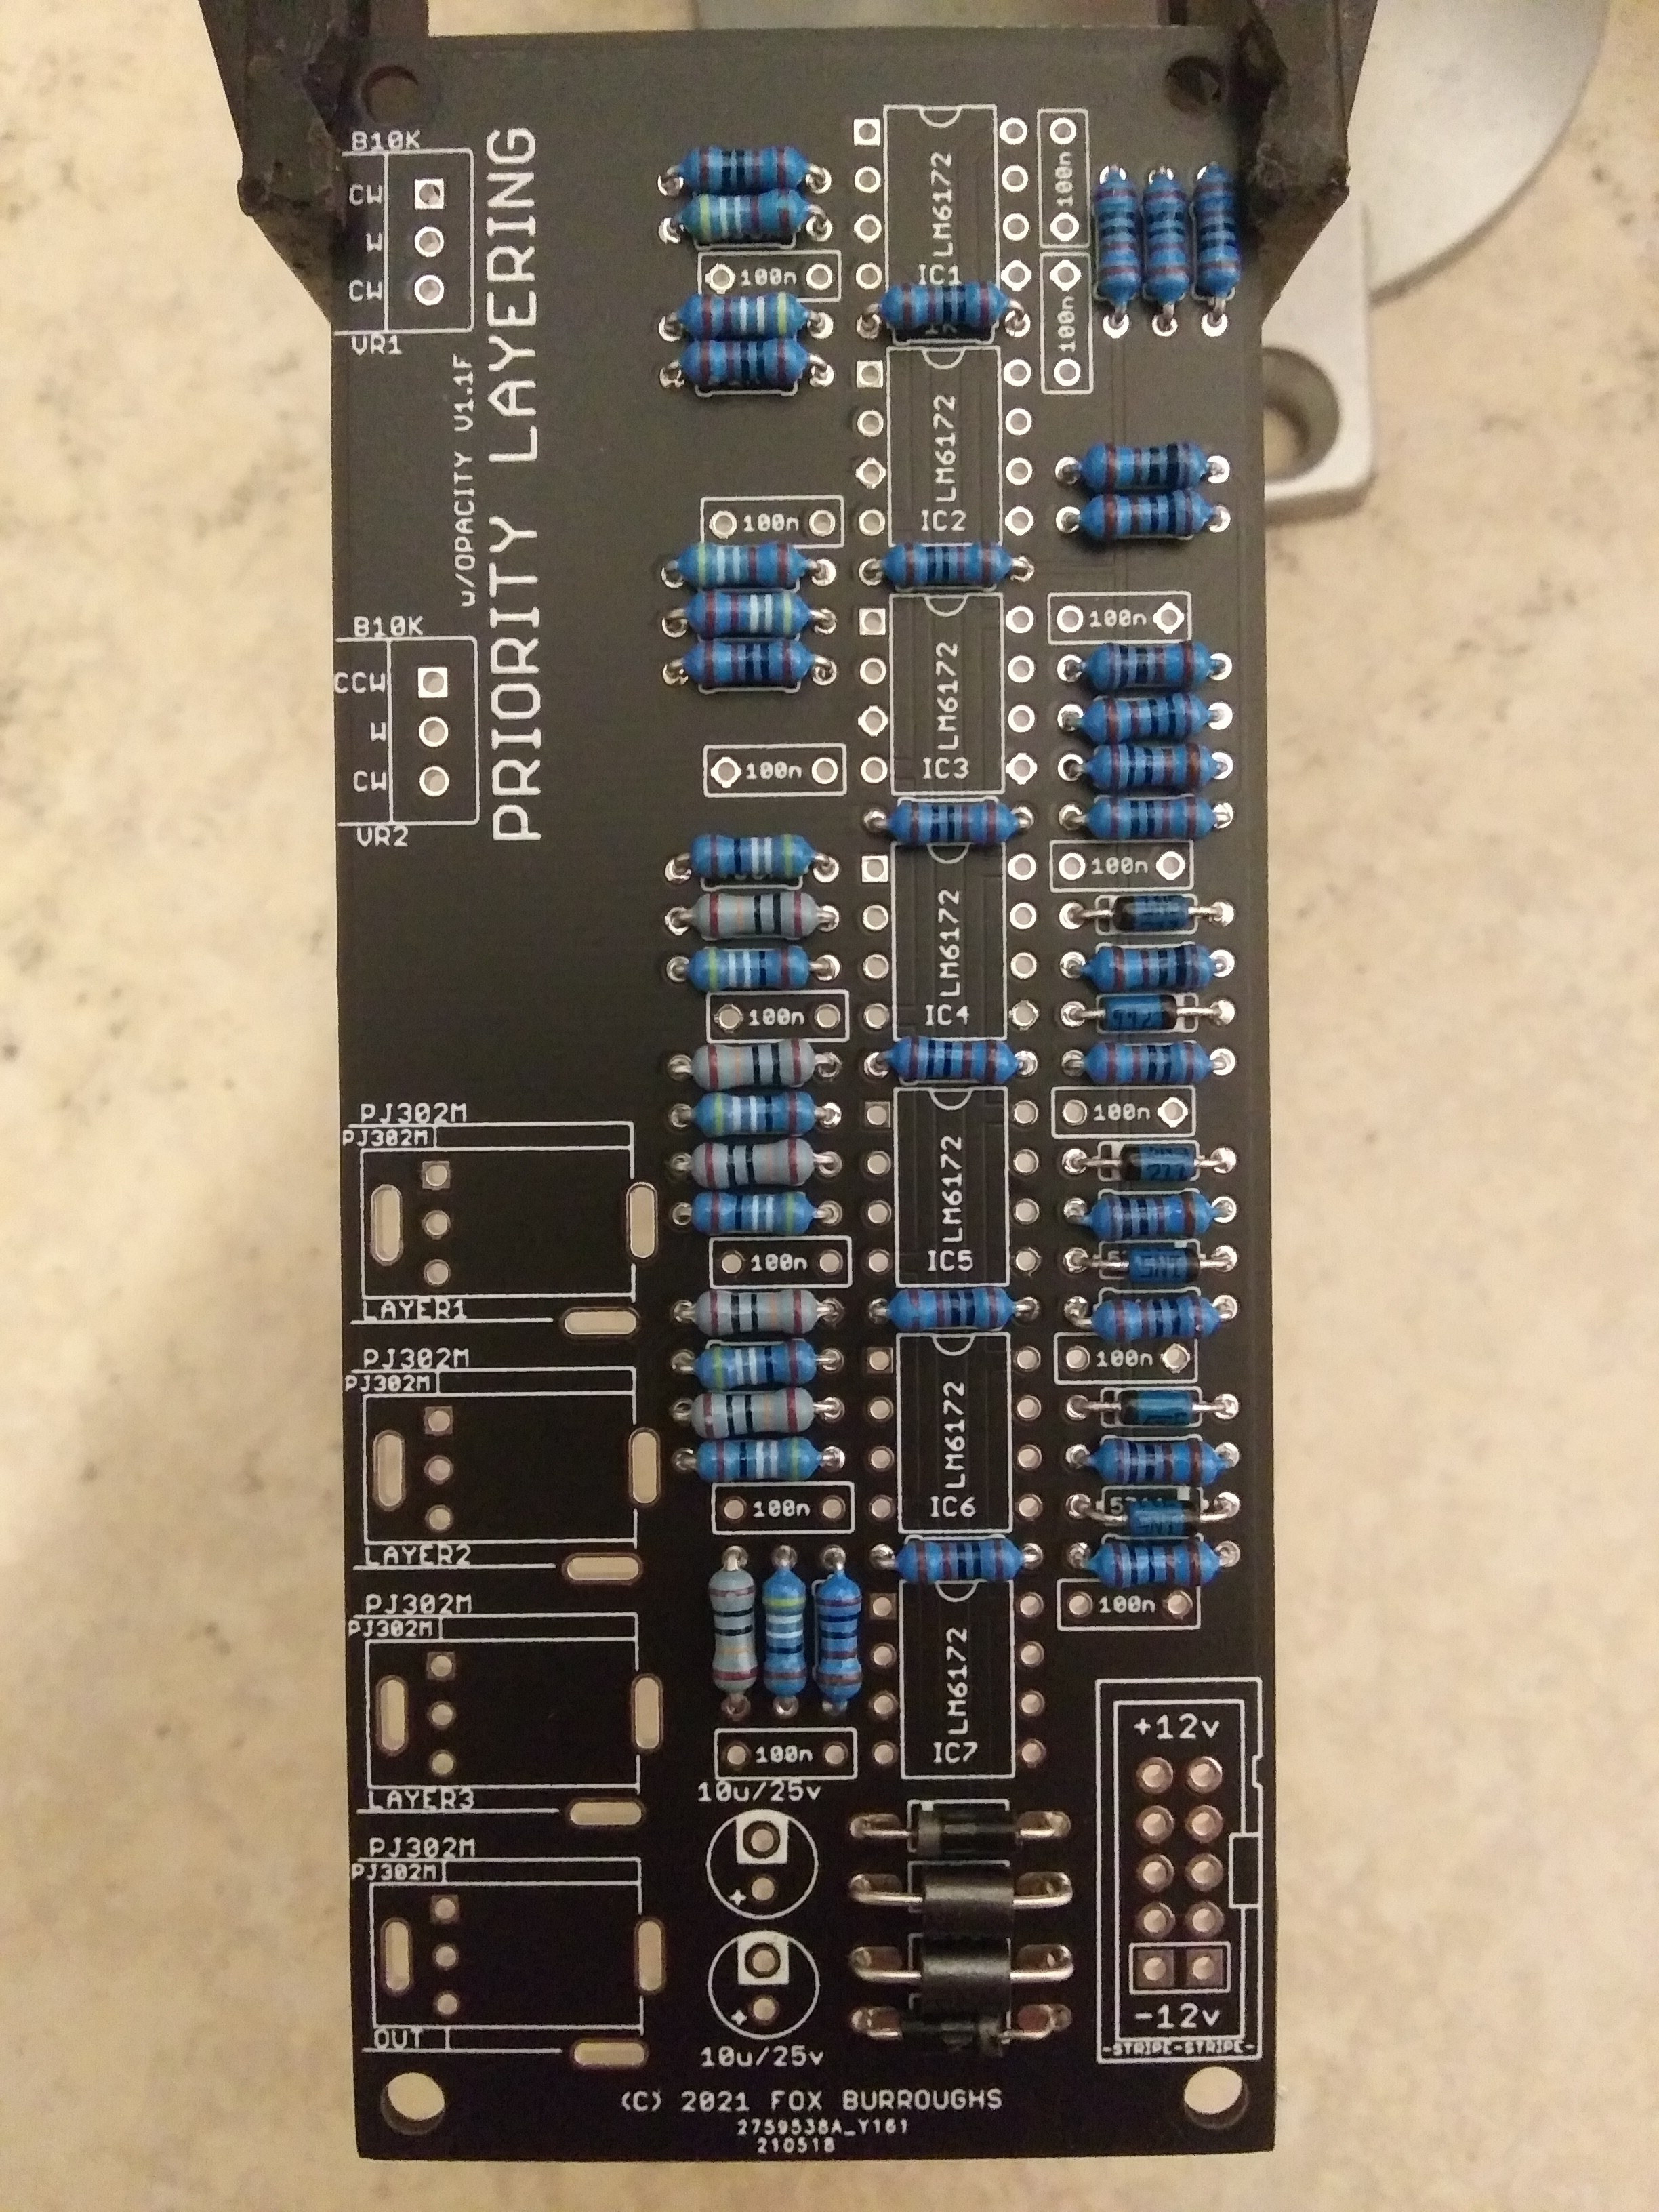
4 Likes

BOM and Build Guide

Click for BOM:
Qty Value Parts
25 1K R5, R6, R7, R8, R9, R13, R18, R19, R23, R25, R26, R28, R29, R30, R31, R32, R33, R34, R35, R36, R37, R38, R39, R40, R41
14 100n C1, C3, C4, C5, C7, C8, C9, C10, C11, C12, C13, C14, C16, C17
7 499R R2, R3, R15, R16, R20, R21, R46
7 LM6172 IC1, IC2, IC3, IC4, IC5, IC6, IC7
6 100K R1, R4, R14, R17, R24, R27
6 1N5711 D3, D4, D5, D6, D7, D8
4 4.99K R10A, R11, R12, R22A
4 PJ302M LAYER1, LAYER2, LAYER3, OUT
2 10u/25v C2, C6
2 1N4001 D1, D2
2 68R Ferrite Bead FB1, FB2
2 B10K - T18 shaft VR1, VR2
1 2x5 (10-Pin) male header J9
1 Pcb set -
1 10-16 Pin Power Ribbon -
2 Davies Knobs T18 (transparent recommended) -
Click for Build Guide:

Step 0.
Using a PCB vice will improve your DIY experience immensely.

Step 1.
4.99K ohm resistors.

Step 2.
499 Ohm (499R) resistors.

Step 3.
100K resistors.

Step 4.
1K resistors. There are 25 of these, so this is the most tedious step.

Step 5.
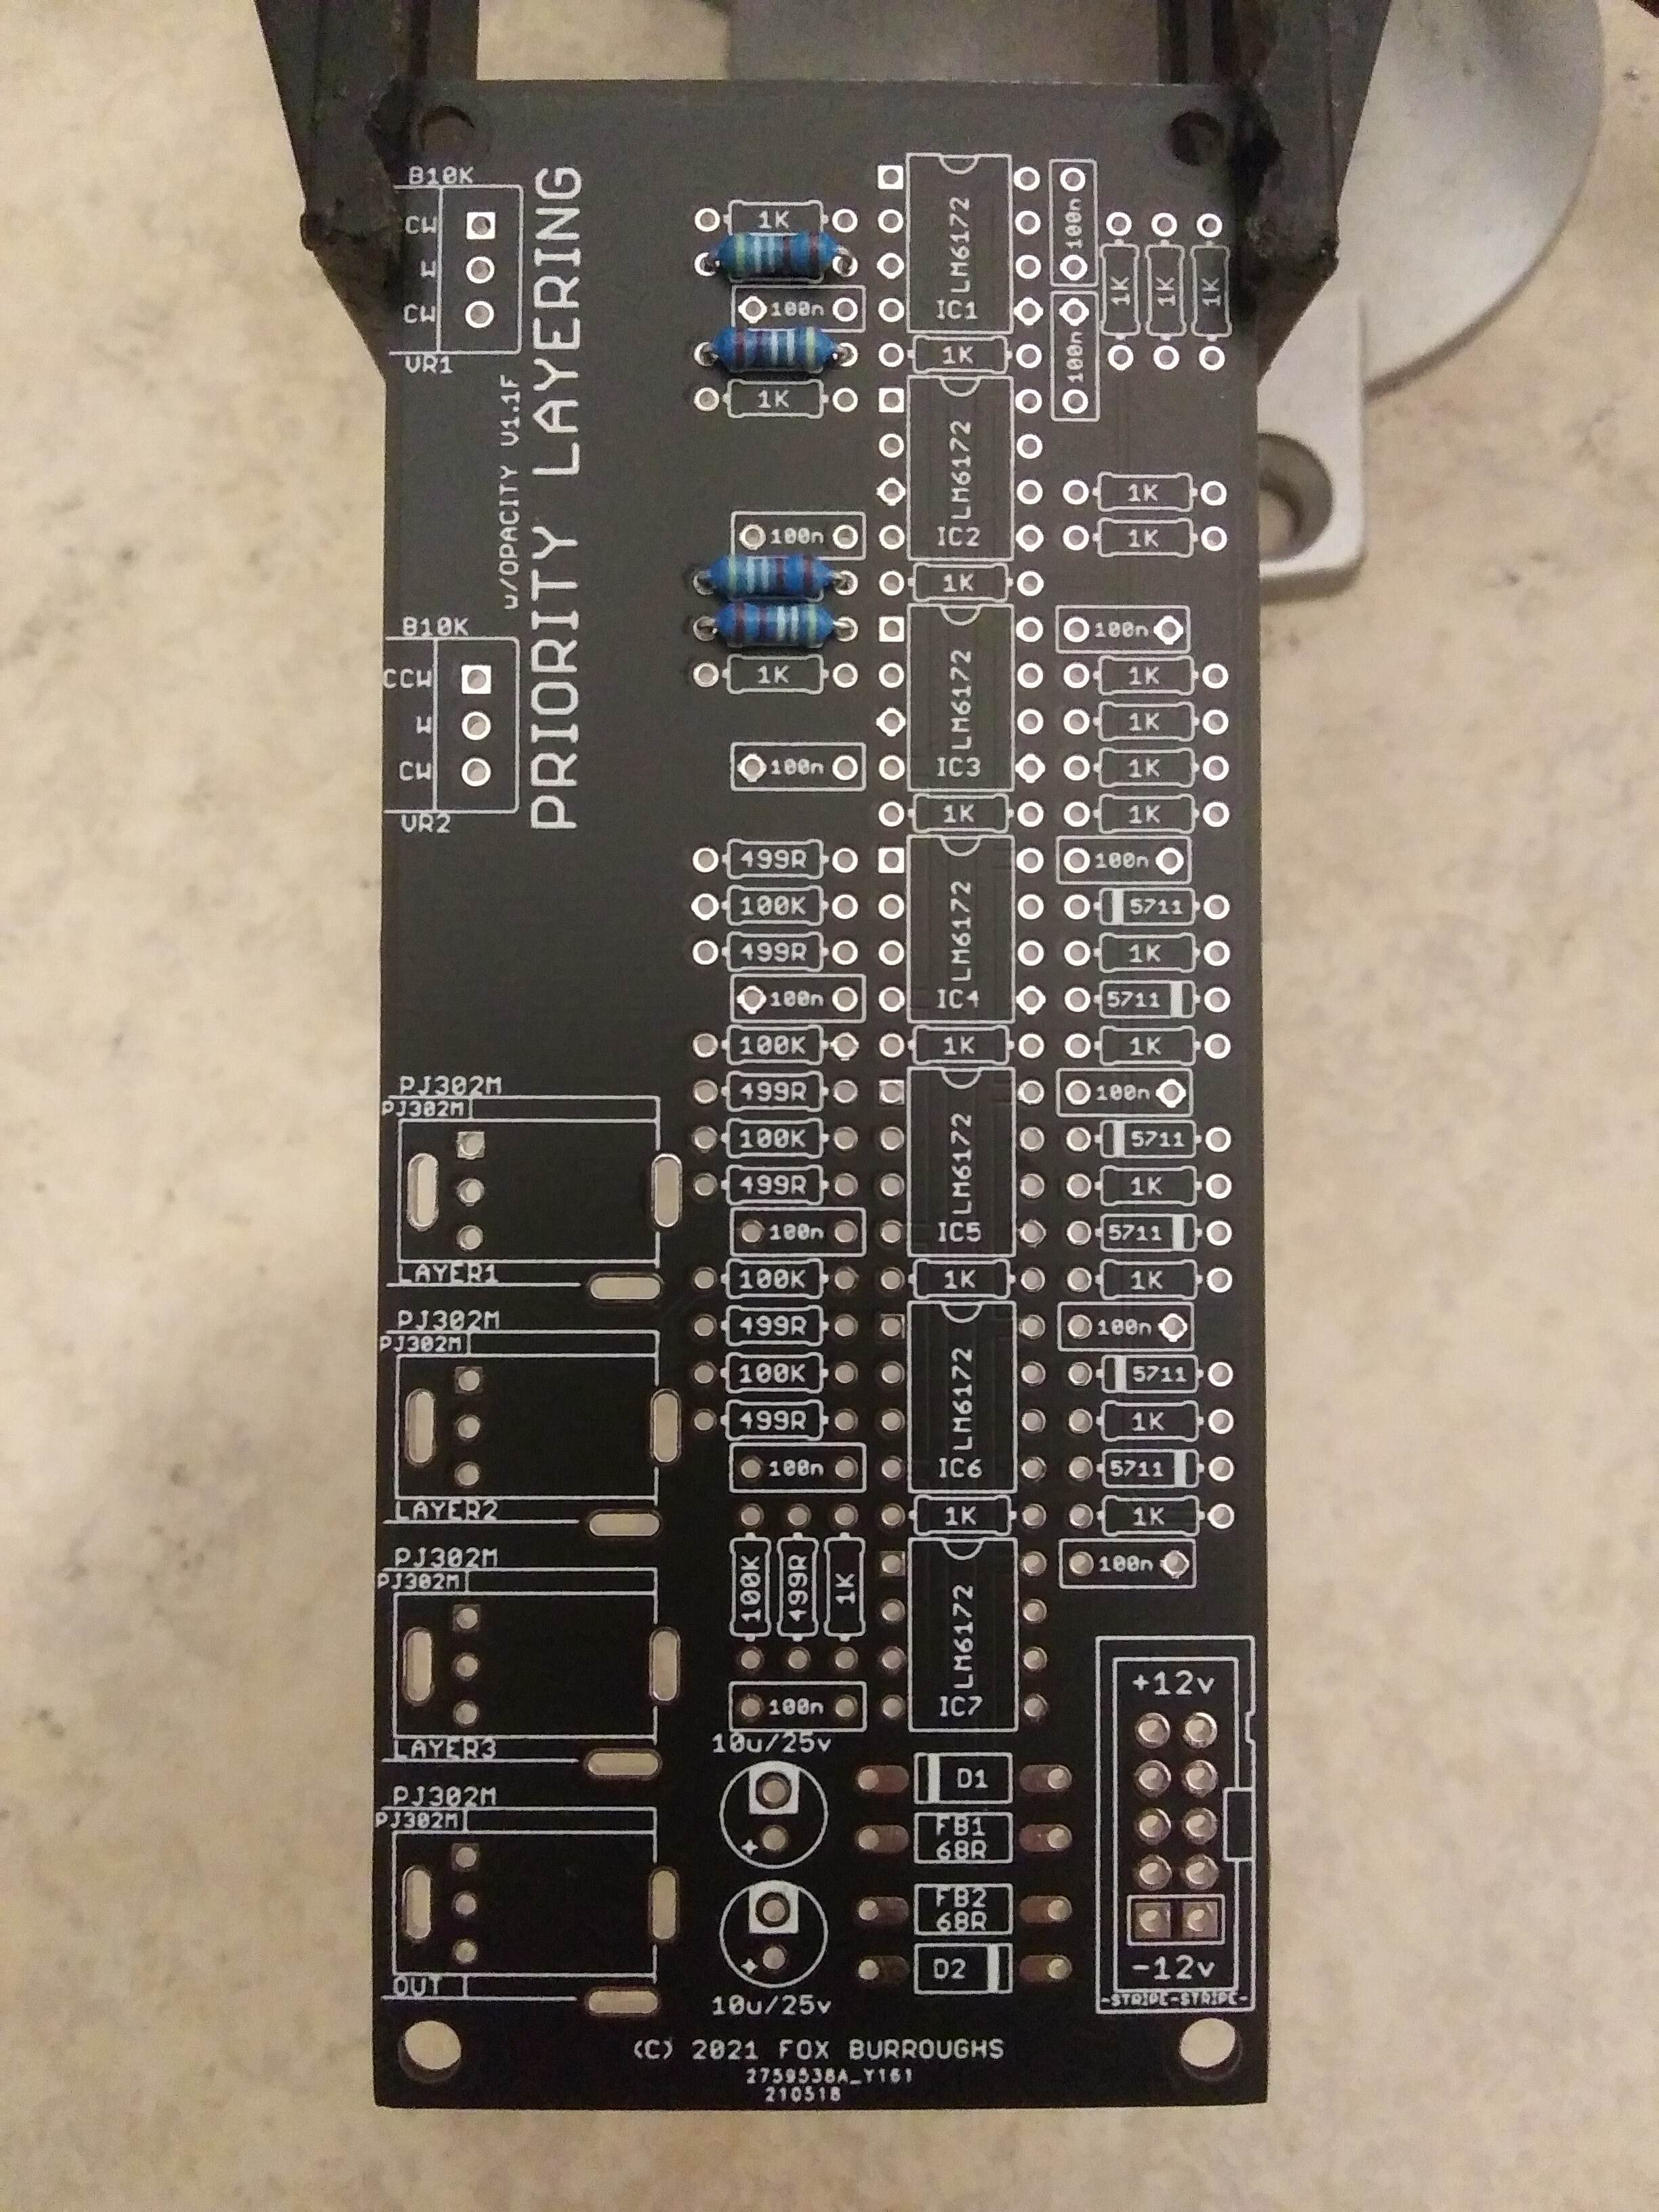
1N5711 diodes. Diodes are polarized, so the orientation is important. Take special note of the black stripe on each diode and line it up with the silkscreen’s stripe for all 6 of these.
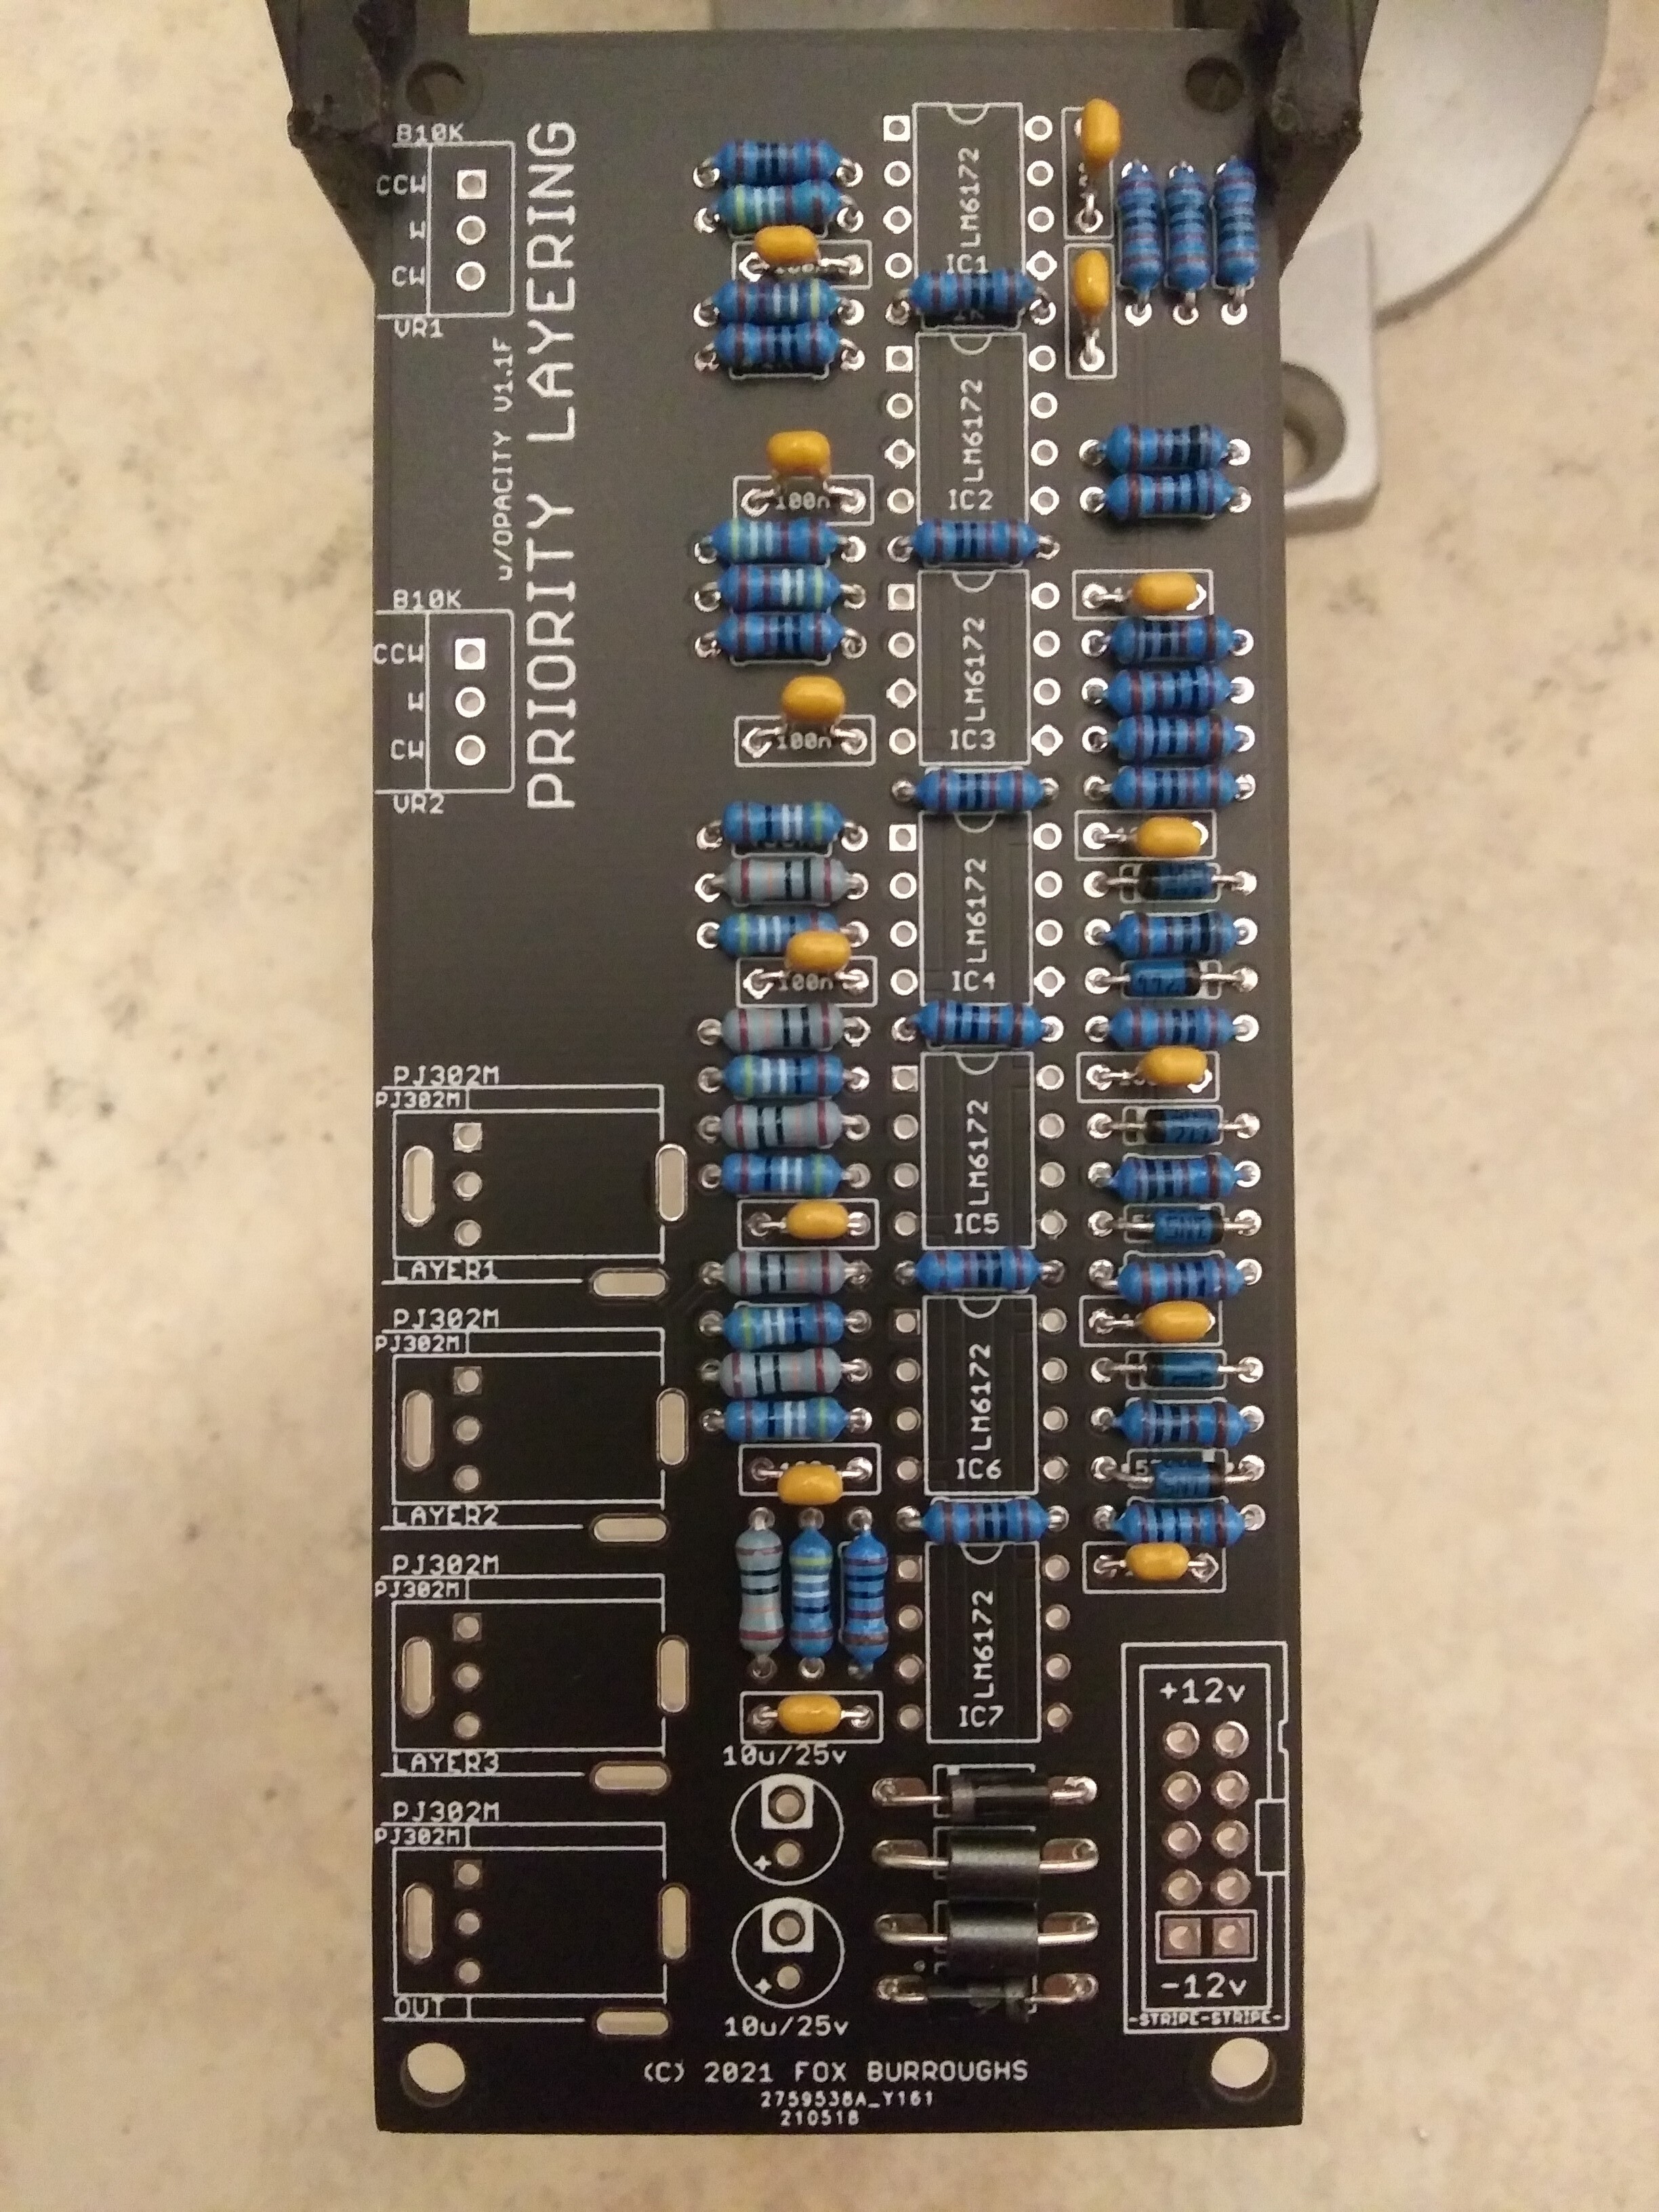
Step 6.
Protection diodes and Ferrite Beads. As with the step above, diodes are polarized.

Step 7.
100nF Ceramic Capacitors. There are 14 caps positioned next to the supply pins of each IC.

Step 8.
10uF electrolytic capacitors and power connector. Unlike the 100nF caps, these ones are polarized. Take note of the stipe on both caps illustrating the negative lead.
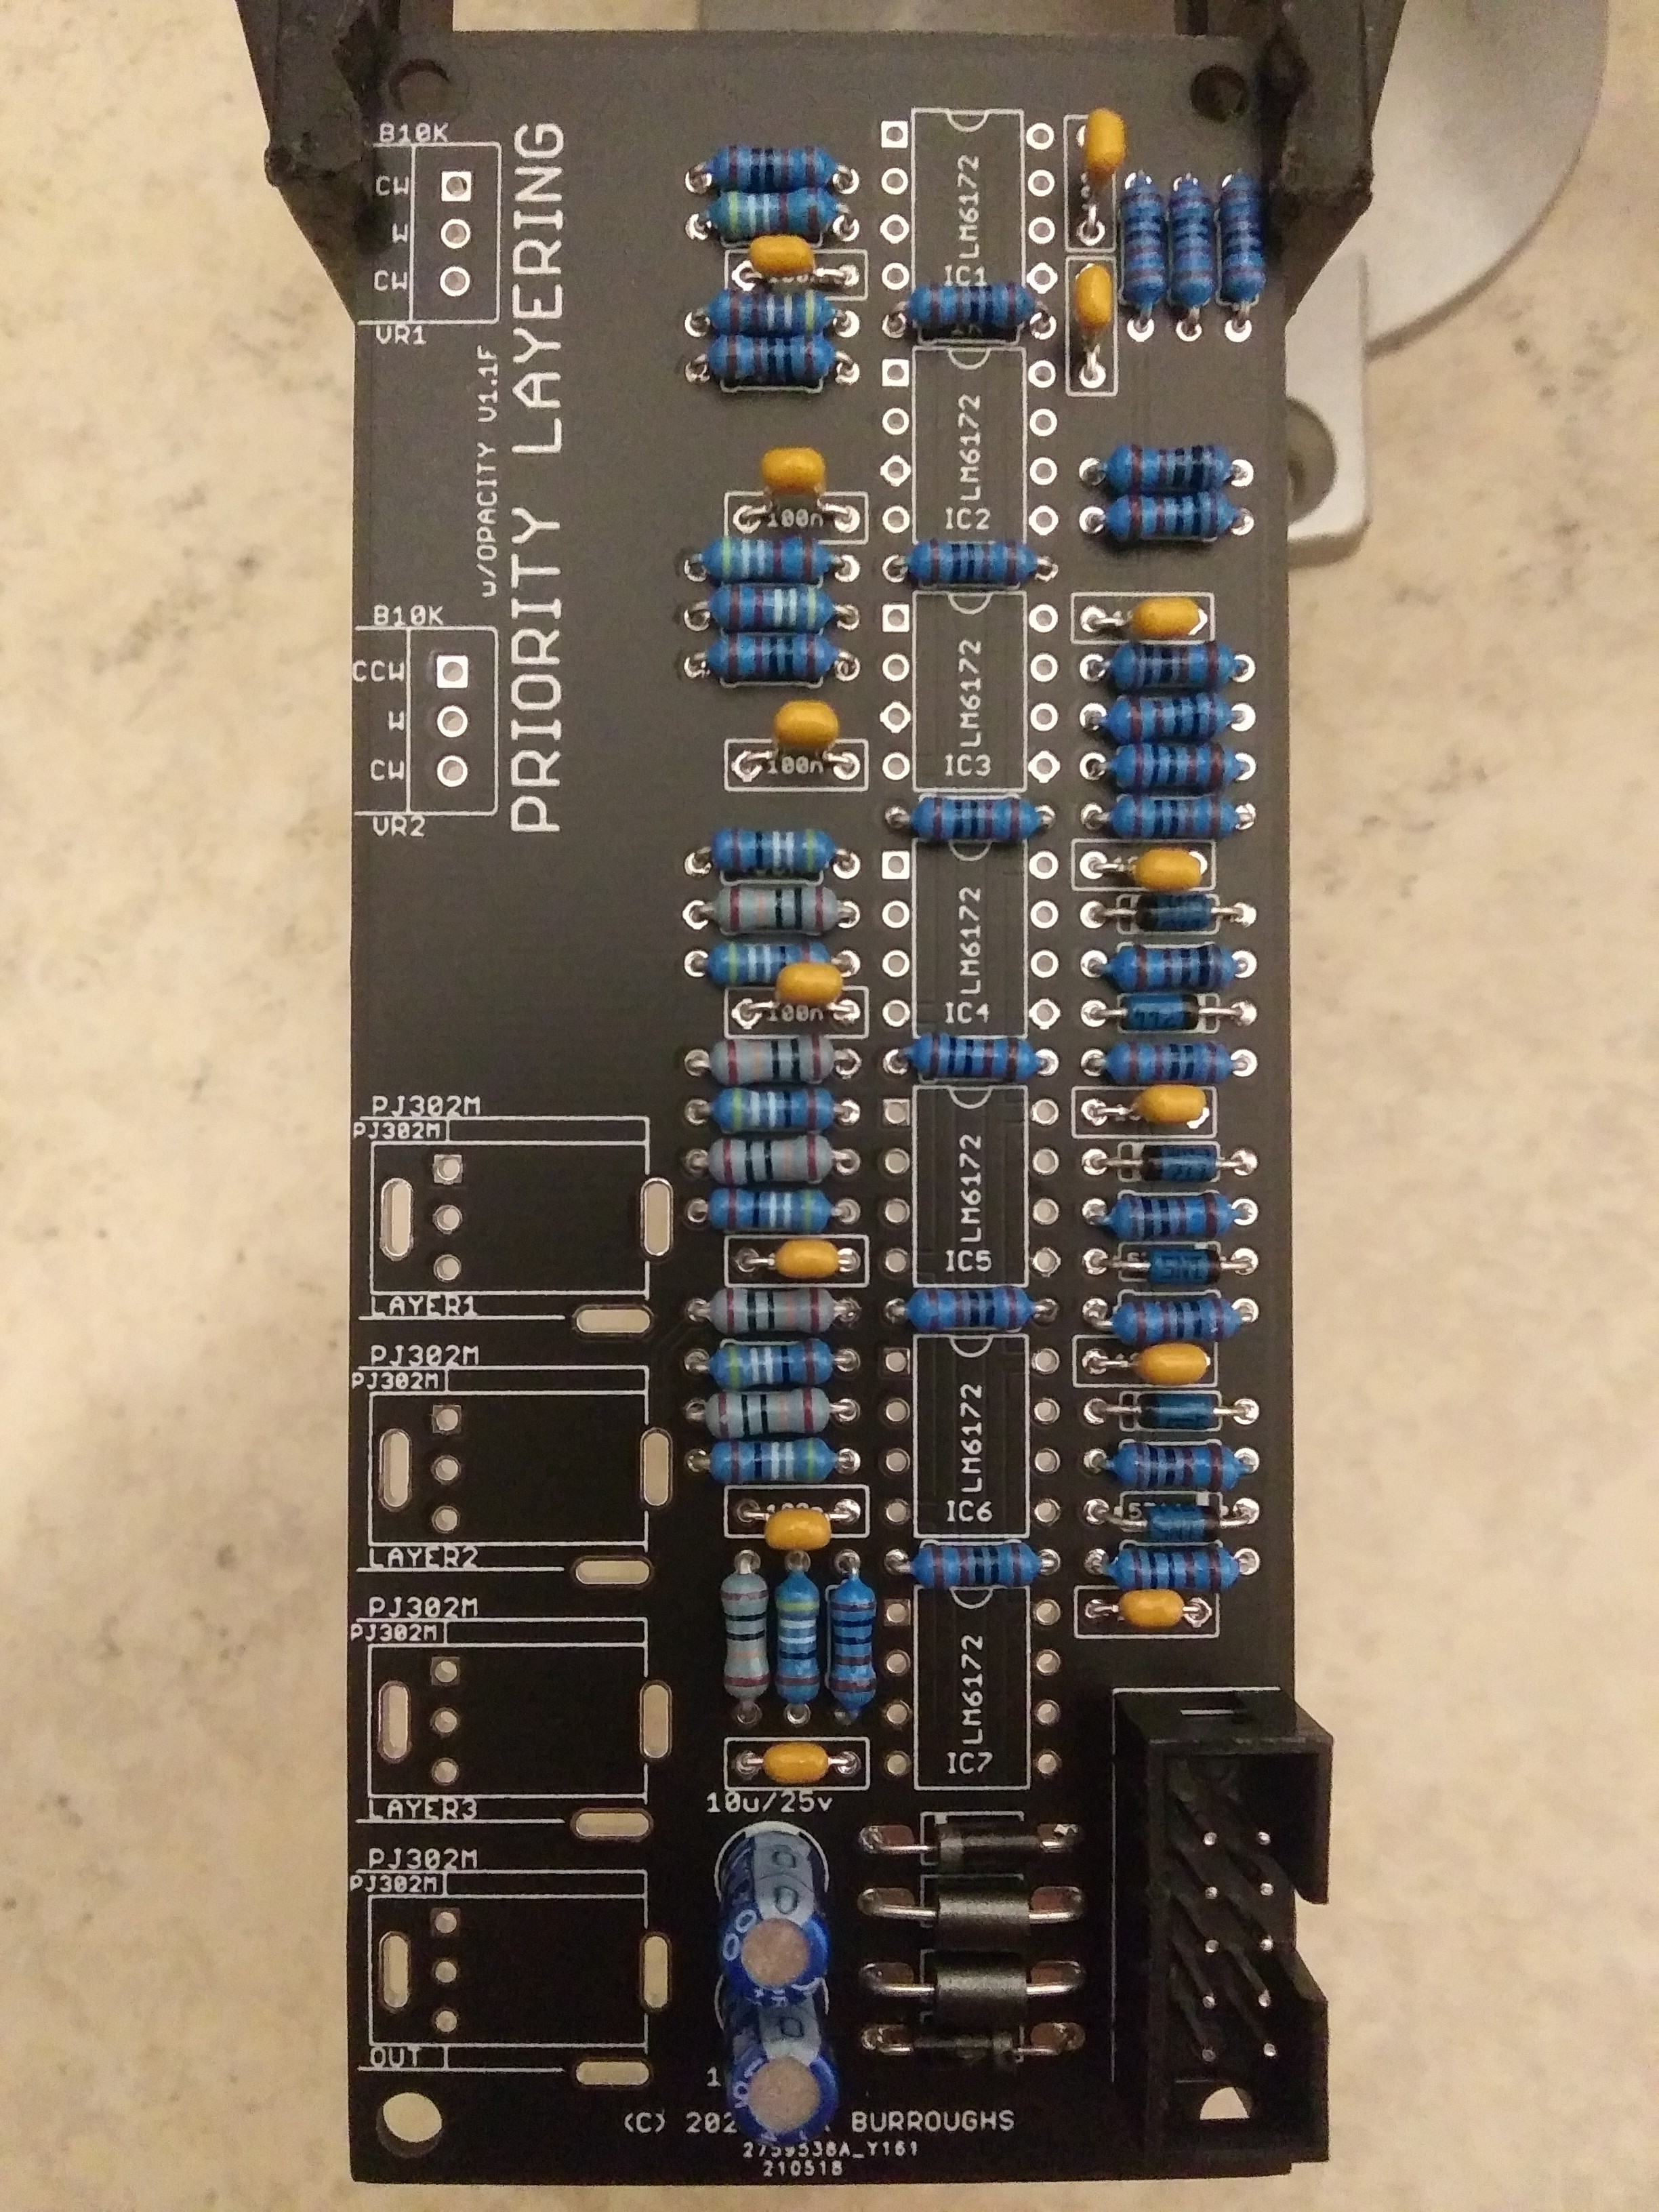
Also important is the “key” or “notch” on your power connector. This points outward from the board as pictured below.
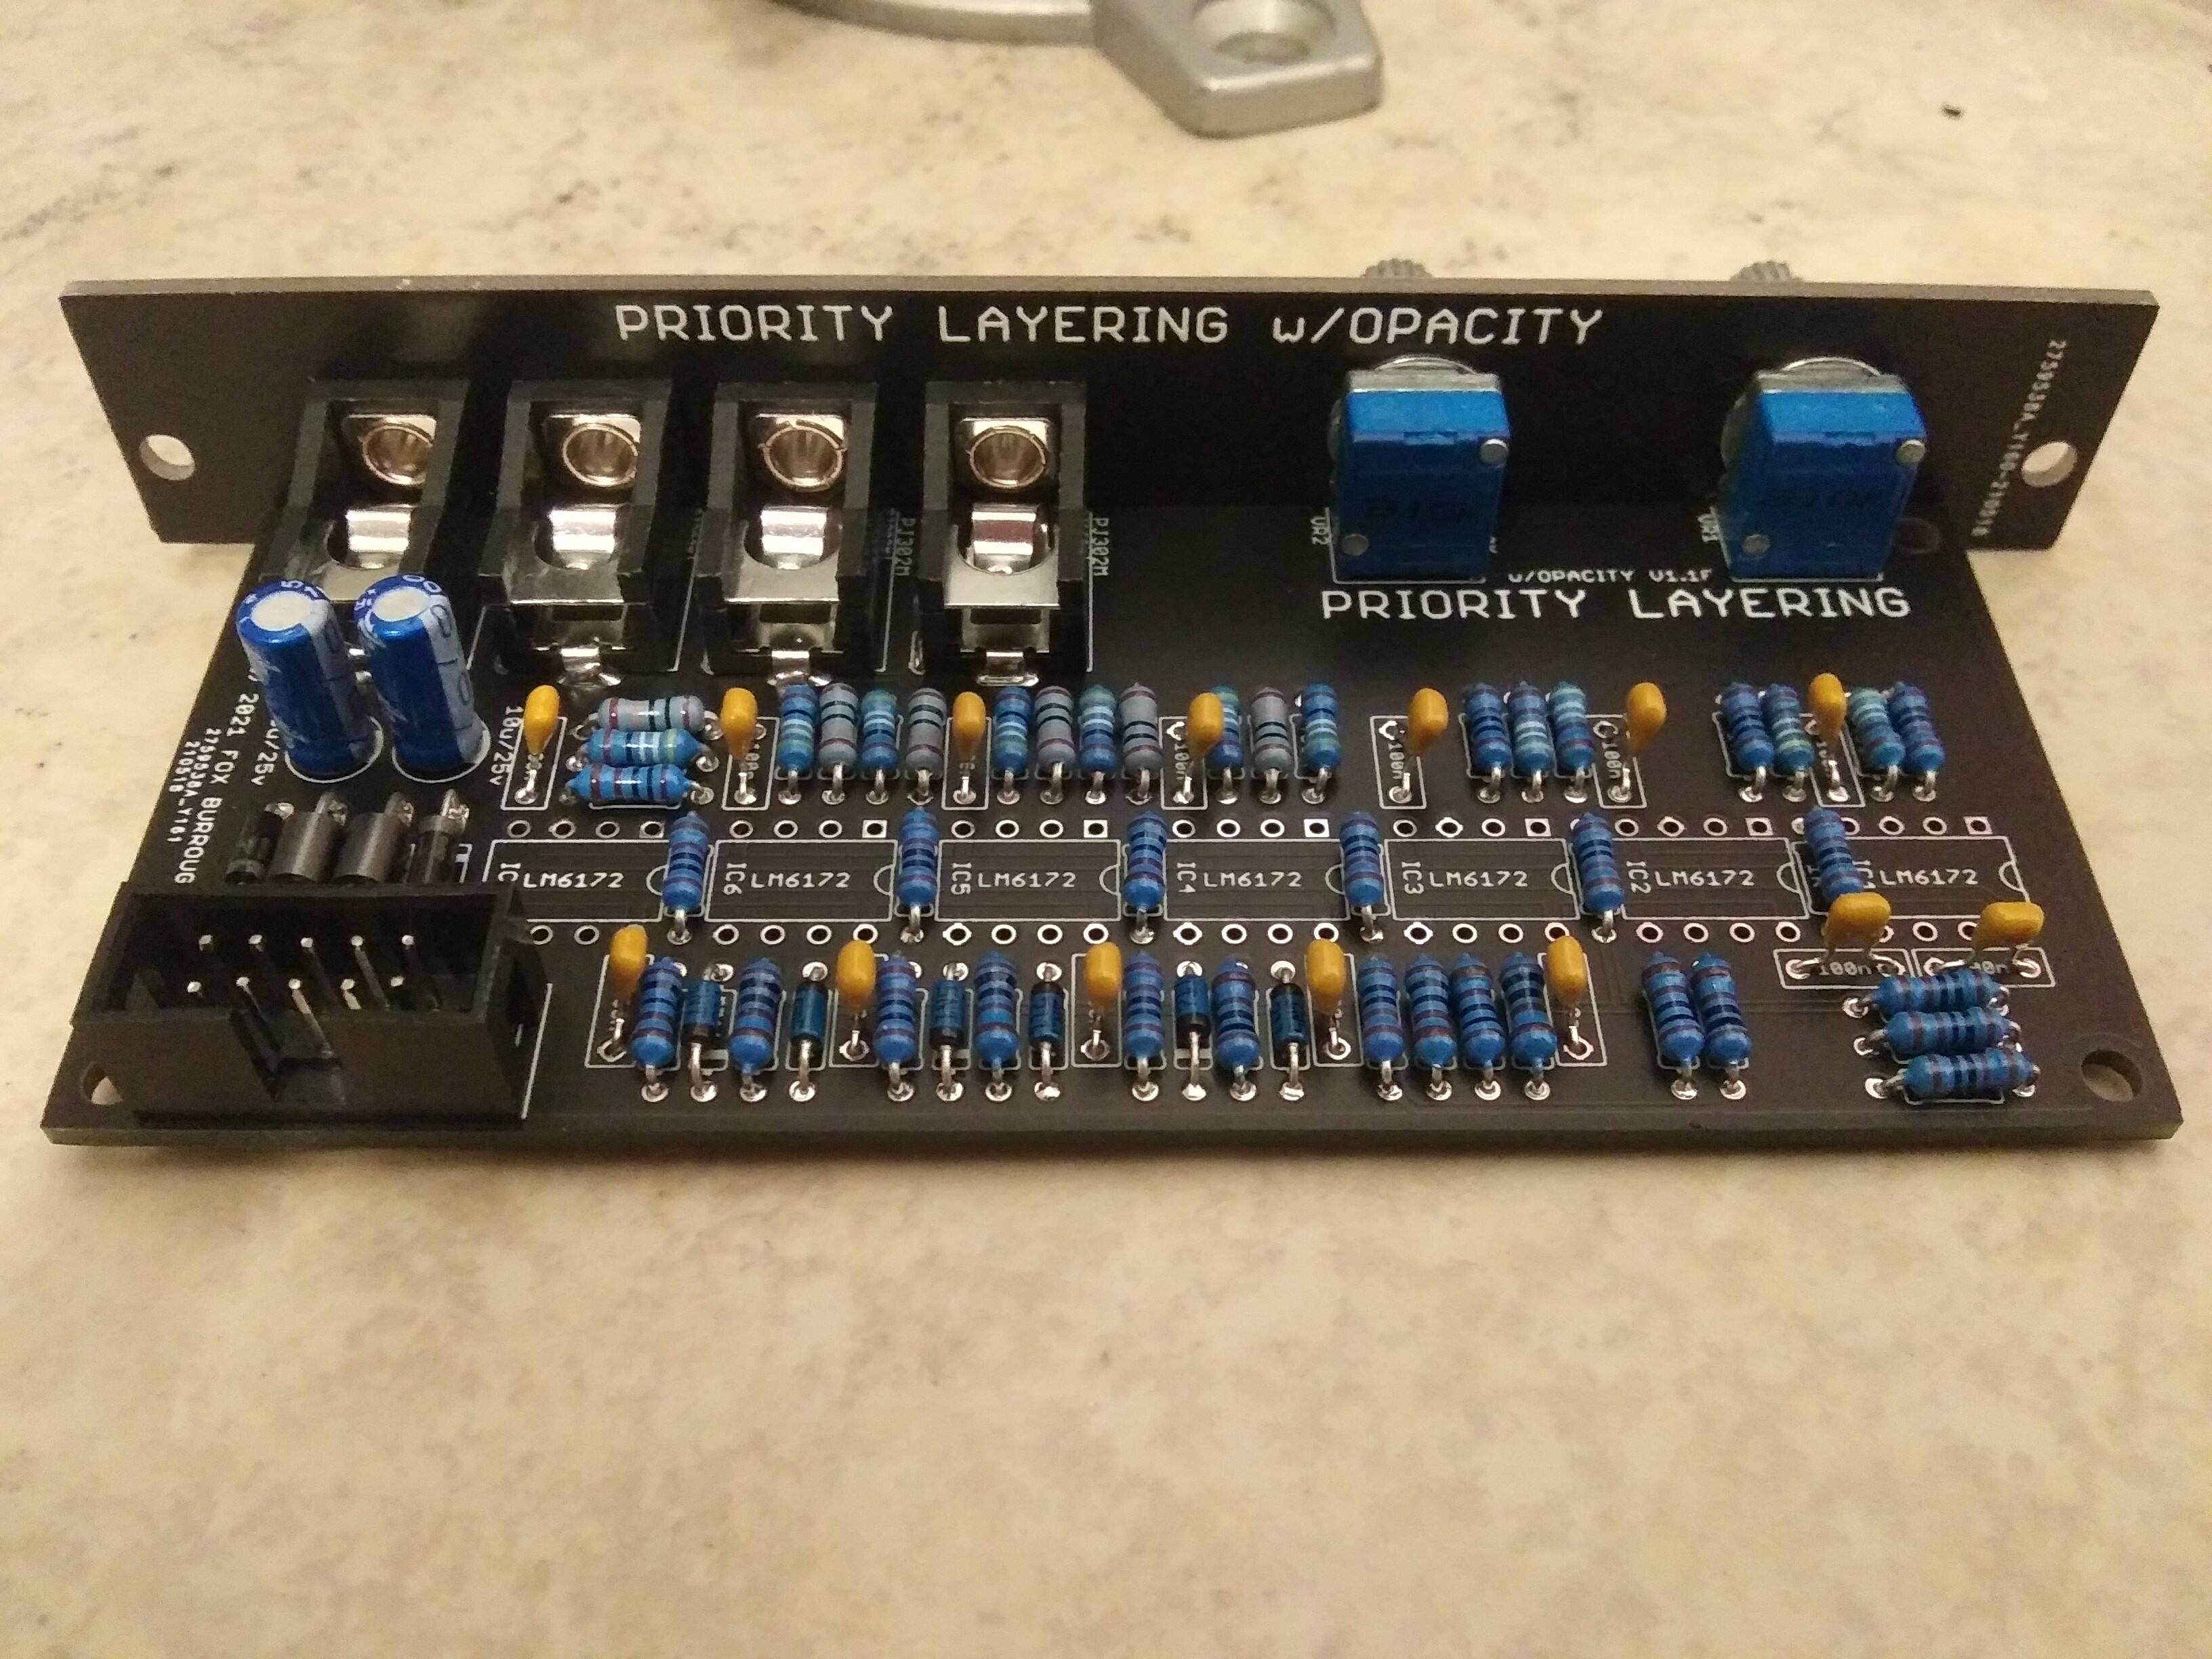
Part 9.
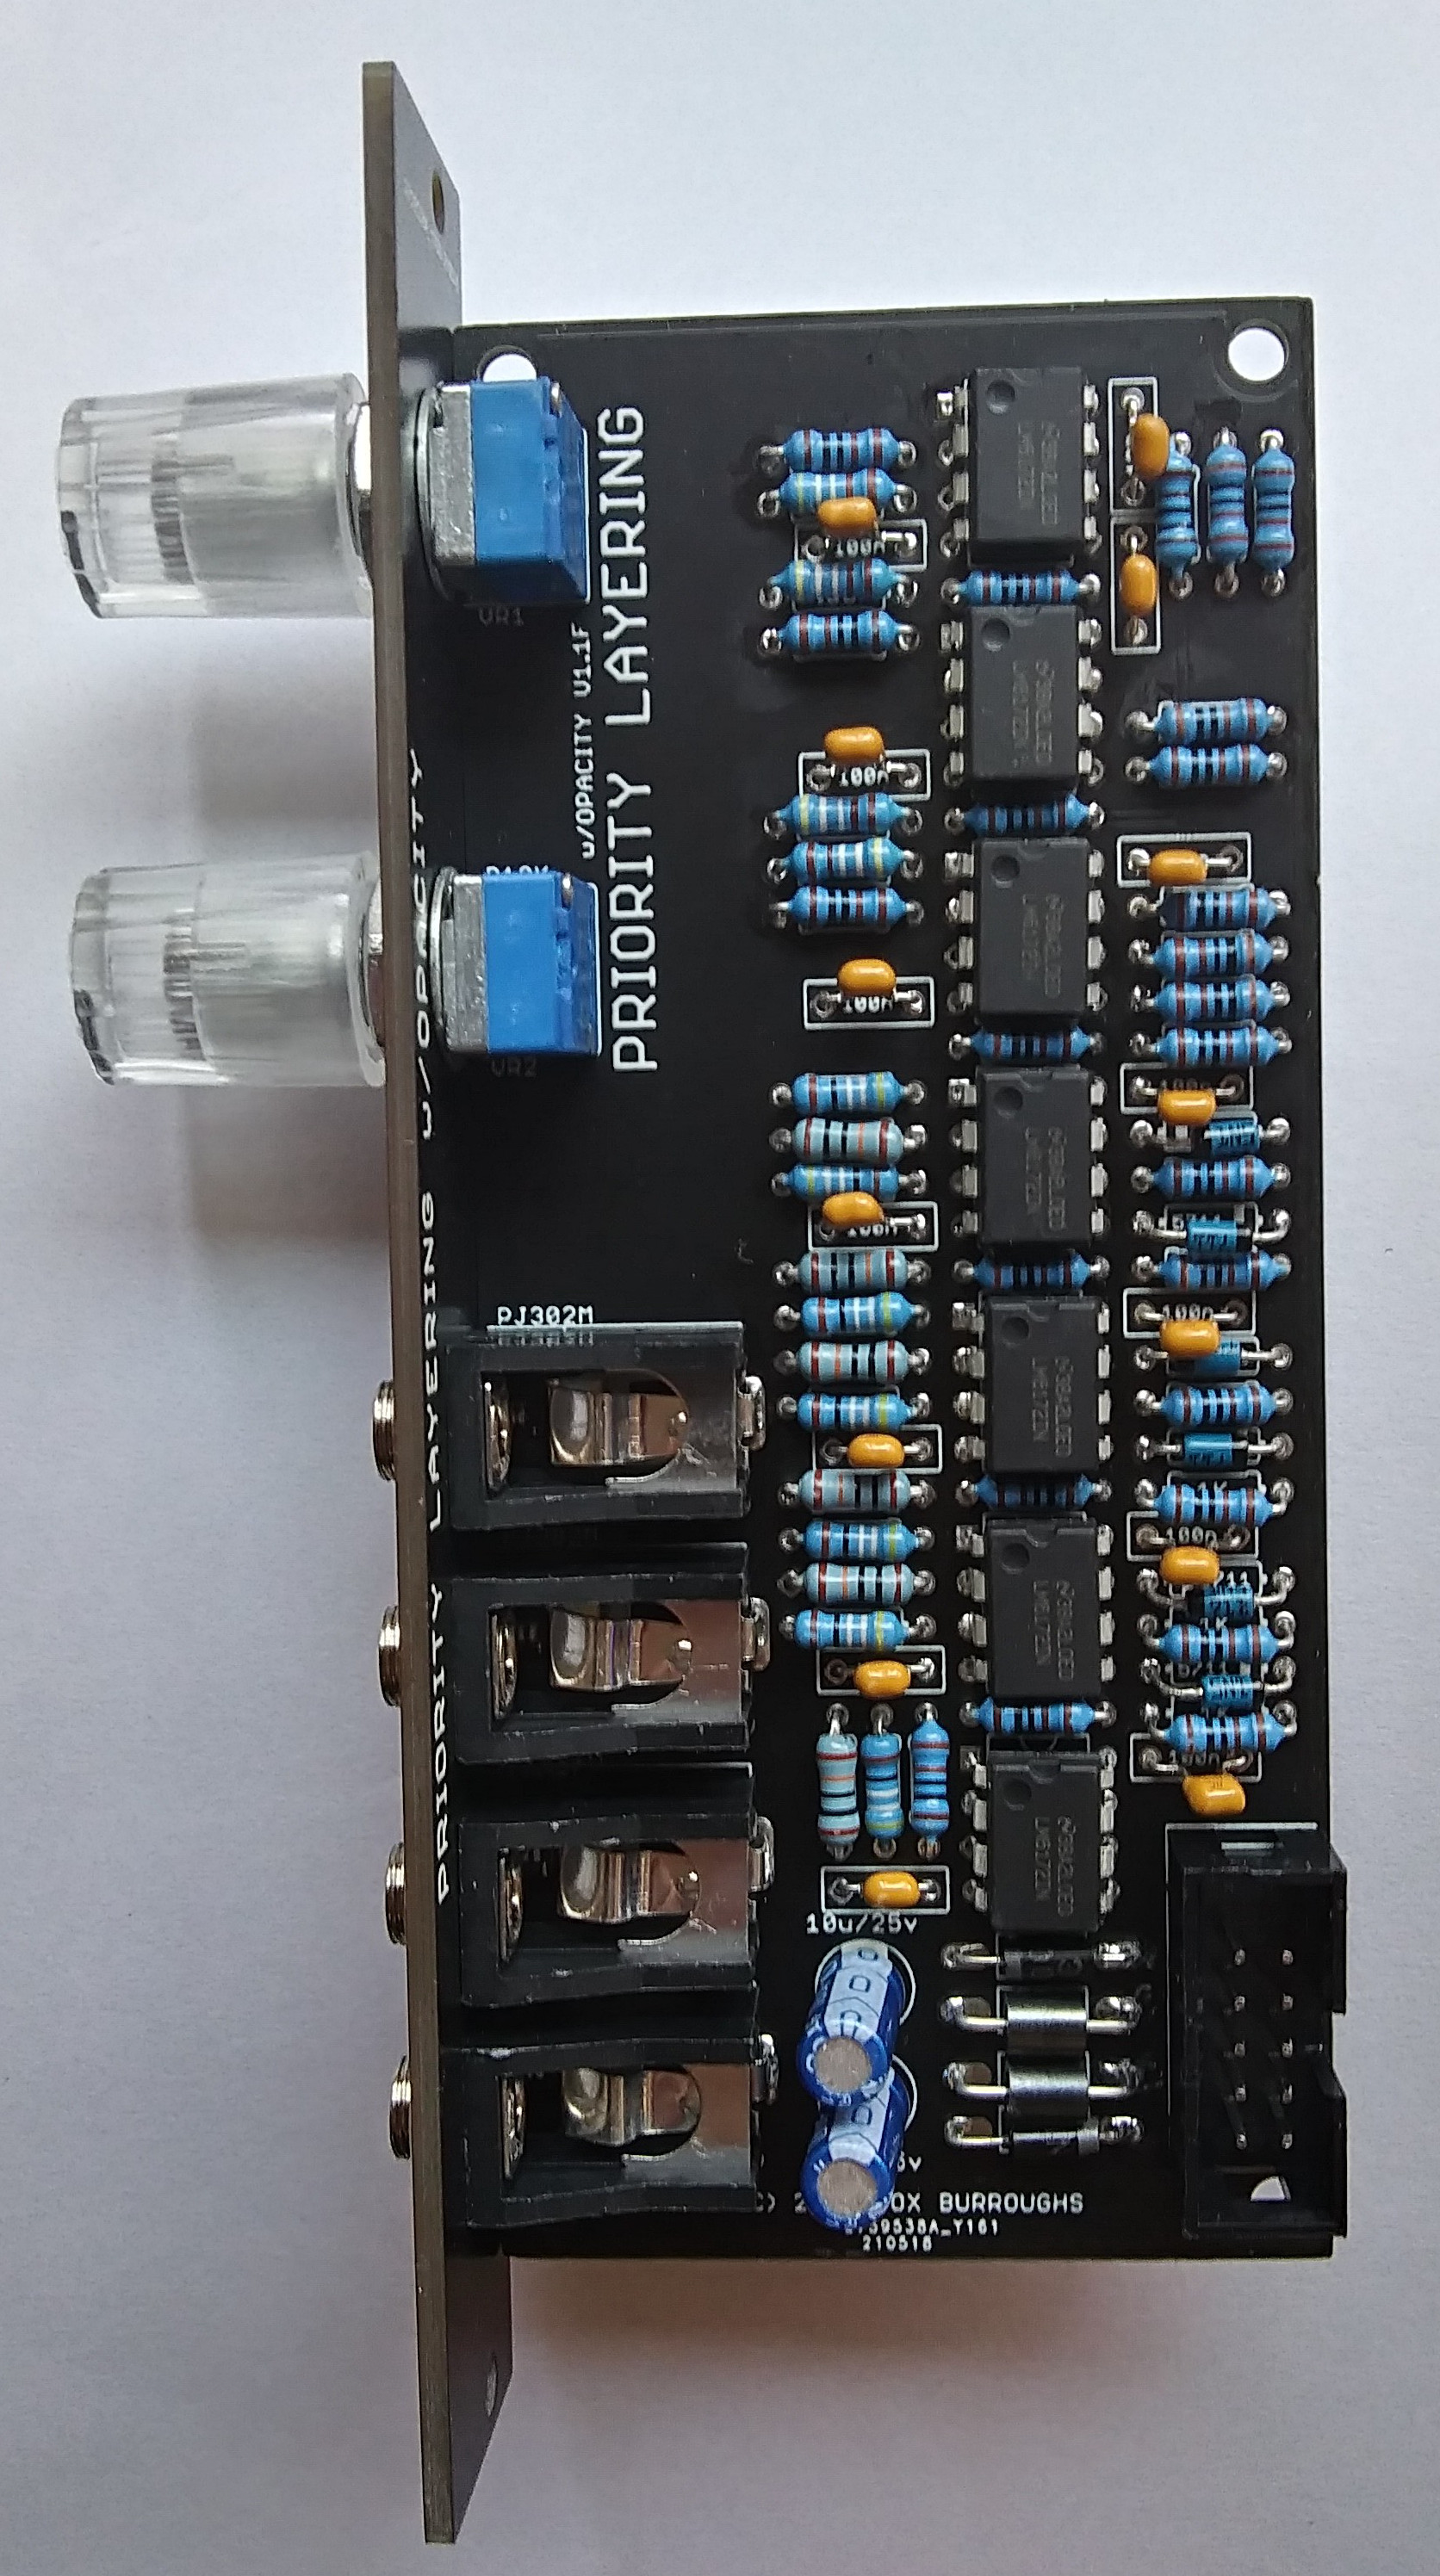
Jacks and pots. Place each of these components into the board and install the faceplate. Gently finger-tighten each nut to the jacks and pots before soldering. This ensures that each one is lined up with the faceplate before they are fixed in place.
Gently flip the board over and solder them in place.

Step 10.
LM6172’s. I prefer to solder my IC’s last as they expensive and may be more sensitive to heat than passive components.
Now that the soldering is finished, I choose to remove the faceplate and clean any excess solder flux away with plenty isopropyl alcohol and a toothbrush. It is also a good time to visually inspect your solder joints.

Afterward, you may finally reinstall the faceplate, fully tighten the nuts in place and install your knobs.
Enjoy!

3 Likes

Very interesting. So this is sort of a monochrome Color Chords? It seems to me that the kind of mixing is related.

1 Like

Looks very interesting!
2 pcb sets for me please!

2 Likes

Very cool! Does anyone from the U.K. want to go for some combined shipping?

3 Likes

I’ll take a built module please

1 Like

I’m very interested but I’d need to see some video demos before I can decide if I want to commit 7 LM6172’s to this or not.

1 Like

@Marizu, @Agawell, @allthesixes666

2 Likes

I’ll happily take a couple.
@Vanta, @meudiademorte, @destroythings & anyone else in Germany want to combine shipping?

3 Likes

happy to take two built modules!

1 Like

I’ve added several videos to the second post.
Now I am working on the build guide.

3 Likes

If I could grab 2 pcb sets, that would be amazing! Thanks yo, I loved the shutter so much, had to jump on these asap! :heart_eyes::heart_eyes:

1 Like

I’d like 2 PCB and panel sets, please!

1 Like

I’ll take a built Module!

1 Like

ooh if there’s one or two pcb/panel sets left please count me in :slight_smile:
happy to join/combine shipping for UK people

2 Likes

I’ll take a built one if any are left, please and thank you!

1 Like

I’d like a built module as well please :slight_smile:

1 Like

I’ll take a pcb set if still available!

2 Likes

Also down for a built module, love this project & design!

2 Likes